? Are you ready to learn practical steps you can take to make your home safer and more resilient against disasters?

This image is property of pixabay.com.
How Can You Build A Disaster-Resilient Home?
Designing and building a disaster-resilient home means creating a safe, durable place that reduces risk and helps you recover faster after a disaster. You’ll look at hazards likely to affect your area, adopt building strategies that reduce damage, and plan for utilities and supplies so you can shelter in place if needed.
Why resilience matters for your home
A resilient home protects lives, reduces repair costs, and minimizes disruption to your routine. You’ll find that investments in resilience often pay off through lower insurance premiums, higher property value, and peace of mind.
Assessing risk and planning
Start by understanding which hazards pose the greatest threat to your location. This informs the materials, structural systems, and site choices you’ll prioritize.
Identify local hazards
Look for flooding, hurricanes or high winds, earthquakes, wildfires, heavy snow and ice, landslides, and tornadoes. Use local hazard maps, historical records, and community planning documents to build a clear picture of risk.
Evaluate your site
Your site’s elevation, slope, vegetation, nearby water bodies, and access routes all matter. You’ll want to know how water flows across the land, where wind funnels, and whether slopes could fail in heavy rain or earthquakes.
Set performance goals
Decide what “resilient” means for you: is it surviving a major event without structural failure, maintaining habitability for a week without utilities, or minimizing repair costs? Clear goals guide materials, systems, and budget choices.
Planning and design principles
Good design reduces vulnerability while optimizing comfort and costs. Prioritize passive strategies that work without power and active systems that enhance resilience.
Siting and orientation
Place your home on the highest practical ground, oriented to reduce wind and sun exposure where appropriate. You’ll want to avoid low-lying flood-prone areas and steep unstable slopes whenever possible.
Compact, simple forms
Simple rooflines and compact building shapes reduce wind and seismic loads and simplify construction. Complex overhangs, long cantilevers, and excessive glazing can increase vulnerability.
Redundancy and separation
Design critical systems with redundancy: multiple power sources, water storage, and communication options. Separate utilities (gas, electrical mains) where possible to reduce cascading failures.
Foundation and flood resilience
Flooding is among the most common and costly hazards. You’ll need strategies to keep water out or minimize damage when water enters.
Elevation and floodproofing
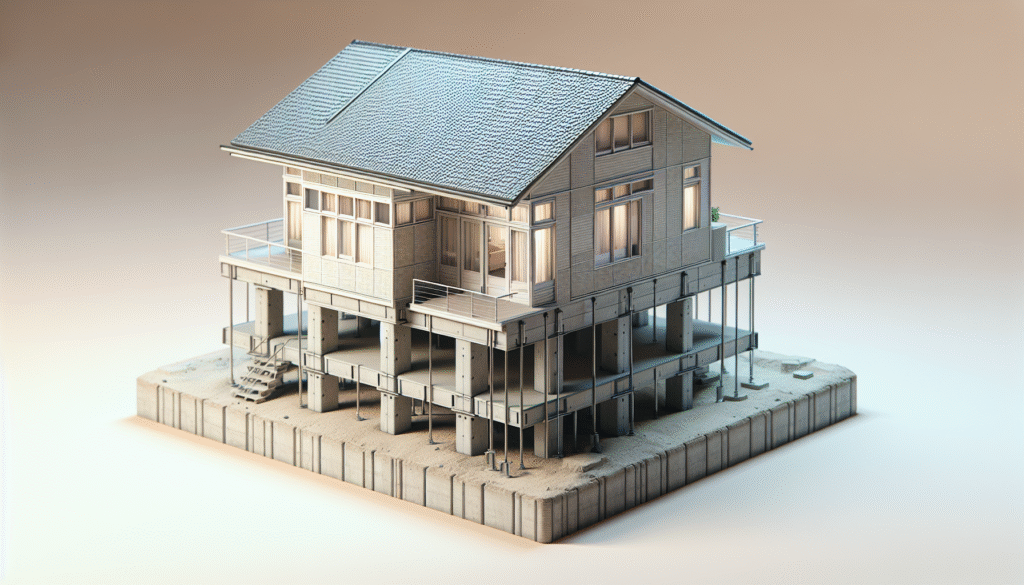
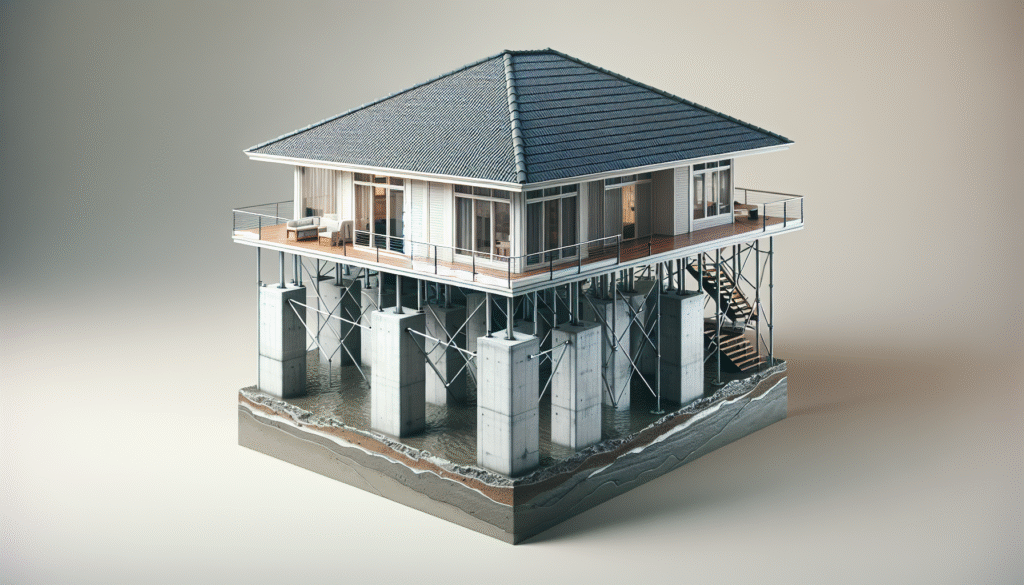
If you’re in a floodplain, elevate the living space above expected flood levels. Use raised foundations, piers, or stilts. Combine elevation with flood-resistant materials in the lower portions of the house.
Wet floodproofing vs dry floodproofing
Wet floodproofing allows water to enter non-critical spaces and uses materials that tolerate moisture, while dry floodproofing seals the building to prevent water entry. Choose based on flood depth, duration, and cost.
Utilities and flood protection
Elevate electrical panels, HVAC equipment, and major appliances above expected flood levels. Use flexible, watertight connections for utilities and consider installing automatic shutoff valves for water and gas.

This image is property of pixabay.com.
Structural resilience: earthquakes and strong winds
You’ll strengthen the skeleton of your home to resist lateral forces from earthquakes and wind loads, reducing risk of collapse and major damage.
Continuous load path
Create a continuous load path that ties the roof, walls, and foundation together so lateral forces are transferred safely to the ground. You’ll use straps, hold-downs, shear walls, and proper anchoring.
Shear walls and bracing
Install appropriately sized shear walls and diagonal bracing to resist horizontal forces. The location and continuity of these elements are as important as their strength.
Roof and connections
Secure roof-to-wall connections with nails, straps, or metal connectors designed for local wind speeds. You’ll also want a roofing system that resists uplift—consider interlocking clips and heavy-duty fasteners.
Wind and hurricane protection
Hurricanes and tornadoes create uplift and debris impacts. You’ll protect the building envelope and design for debris and pressure equalization.
Impact-resistant openings
Install impact-resistant windows and doors or use storm shutters. Reinforced openings prevent wind-driven rain from entering and reduce internal pressurization that can lift the roof.
Roof shape and overhangs
Choose roof shapes (hip roofs perform better in high winds than gable roofs) and minimize large overhangs. Use appropriately rated fasteners and connectors for all roof elements.
Landscaping for wind
Avoid planting trees too close to the house and maintain a defensible perimeter to limit falling-tree damage. You’ll also establish windbreaks with strategic vegetation placements where appropriate.

This image is property of pixabay.com.
Wildfire-resistant construction
Wildfires spread by embers and flames. You’ll focus on ignition-resistant materials, landscaping, and fuel management around your property.
Defensible space and vegetation management
Create zones around the house where vegetation is managed to reduce fire intensity. Maintain clear space immediately adjacent to the building and use low-flammability plants in the near zone.
Ember-resistant detailing
Sealing vents with ember-resistant screens, closing soffits, and using non-combustible siding reduce ember entry. You’ll ensure there are no gaps where embers can collect.
Fire-resistant materials
Use Class A-rated roofing, non-combustible siding (metal, fiber cement, stucco), and tempered glass for windows. If you use wood, consider protective claddings or fire-retardant coatings.
Snow, ice, and cold weather resilience
In cold climates, you’ll design to manage snow loads, prevent ice dams, and ensure systems operate in freezing conditions.
Roof loads and pitch
Design your roof structure for expected snow loads and use steeper pitches where snow shedding is desirable. Reinforce connections and ensure attic ventilation to reduce ice dam formation.
Insulation and air sealing
Proper insulation plus continuous air sealing reduces heat loss and prevents ice dams. You’ll pay attention to roof-to-ceiling insulation and sealed ventilation paths.
Utilities and freeze protection
Insulate pipes, provide heat trace for critical lines, and design water systems to avoid freezing. Backup power is vital to maintain heating during outages.

Utilities and critical systems
Keeping utilities functional or having alternatives is central to resilience. You’ll design systems with redundancy, protection, and accessibility in mind.
Backup power options
Consider whole-house generators, solar PV with battery storage, or hybrid systems. You’ll size systems based on essential loads (refrigeration, heating, lighting, communications) and how long you need them.
Water supply and sanitation
Install rainwater collection and storage, a gravity-fed potable water system if feasible, and filtration. Plan for sanitation — portable toilets or graywater management — during prolonged outages.
Fuel and gas safety
Install automatic gas shutoff valves that trigger after earthquakes and ensure proper ventilation for any combustion appliances. Where gas is used, provide alternatives for cooking and heating.
Electrical design and surge protection
Use whole-house surge protection and critical-load subpanels. Elevate panels out of flood-prone areas and clearly label circuits for emergency isolation.
Materials and construction systems
Material choice affects durability, maintenance, cost, and performance in different hazards. You’ll choose combinations that match your risk priorities and budget.
Comparative table of common building materials
| Material | Strengths | Weaknesses | Best uses |
|---|---|---|---|
| Concrete (cast-in-place) | High compressive strength, fire & water resistant | Heavier, longer cure times, higher carbon footprint | Flood zones, foundations, shear walls |
| Insulated Concrete Forms (ICFs) | Good thermal, strong, resilient | Higher initial cost, requires skilled labor | Energy-efficient and flood/earthquake-resistant walls |
| Steel framing | High strength-to-weight, non-combustible | Corrosion risk, thermal bridging | High-wind and seismic areas |
| Wood framing | Cost-effective, flexible, available | Vulnerable to fire, moisture, pests | Many residential applications; use with protective treatments |
| Structural Insulated Panels (SIPs) | Fast construction, good insulation | Junction sealing critical, expensive | Energy-efficient envelopes, cold climates |
| Masonry (CMU, brick) | Durable, fire-resistant | Heavy, poor tensile strength unless reinforced | Fire-prone areas, foundations, retaining walls |
Durability and maintenance
Choose materials you can maintain given your skills and budget. Even the most durable materials need periodic inspection, sealing, and repairs.

Safe rooms and shelters
For extreme wind events or security, consider a safe room or hardened area designed to remain habitable during an extreme event.
Types of safe rooms
Safe rooms can be interior reinforced rooms, FEMA-rated storm shelters, or basement shelters. You’ll select based on available space, hazard type, and family needs.
Installation and certification
Install safe rooms per FEMA or ICC-500 guidelines when for wind. For tornado and hurricane protection, safe rooms should be anchored and constructed with approved materials and door assemblies.
Retrofitting an existing home
You don’t have to rebuild to improve resilience. Many upgrades are cost-effective and significantly reduce risk.
Priority retrofits
Key retrofits include securing roof-to-wall connections, reinforcing garage doors, elevating utilities, installing backflow valves, and sealing crawlspaces. These measures can reduce damage in wind, flood, and seismic events.
Incremental improvements
Plan retrofits in phases: immediate low-cost fixes (anchors, straps), medium-cost upgrades (shelter, drainage), and longer-term investments (foundation elevation, full re-roof). You’ll balance budget and urgency.
Landscaping, drainage, and site hardening
Your exterior choices influence water flow, fire behavior, and wind impacts. Thoughtful site design reduces hazard exposure.
Grading and drainage
Slope soil away from the foundation, install swales or French drains, and use permeable paving to reduce runoff. You’ll prevent water pooling near the house, which reduces foundation and interior damage.
Erosion and slope stabilization
Use retaining walls, terraces, and deep-rooted vegetation to stabilize slopes. For landslide-prone sites, engineering consultation is essential.
Hardscaping and non-combustible surfaces
Use non-combustible hardscaping near the home in wildfire zones and create gravel or stone belts to reduce ember ignition. Maintain clear access for emergency vehicles.
Maintenance and inspection
Resilience isn’t a one-time task. Regular inspection and upkeep keep systems functioning and risks minimized.
Seasonal checks
Inspect roofs, gutters, seals around windows and doors, plumbing, heating systems, and backup power before each hazard season. You’ll address small issues before they grow.
Professional inspections
Get structural, HVAC, and electrical inspections on a schedule and after major events. Certified professionals can spot hidden weaknesses and recommend repairs.
Emergency planning and supplies
A resilient home includes preparedness plans and supplies so you can respond effectively when disaster strikes.
Family emergency plan
Create a plan for evacuation, sheltering in place, and communication. Identify meeting points, out-of-area contacts, and pet plans.
Emergency kit and redundancy
Maintain at least 72 hours of food, water (1 gallon per person per day minimum), medical supplies, flashlights, batteries, portable chargers, and a battery-powered radio. For enhanced resilience, maintain 1–2 weeks of essentials and alternate power sources.
Communication and information
Keep a list of emergency numbers, local shelter locations, and digital backups of important documents. You’ll use multiple communication channels: mobile, satellite messaging, and battery-powered radios.
Insurance, financing, and incentives
Financial tools help you recover. You’ll review coverages and seek available incentives for resilience upgrades.
Insurance coverage
Understand flood, earthquake, wind, and homeowner policies. Standard homeowner insurance often excludes flood and earthquake — you’ll need separate policies in many areas.
Grants and incentives
Local, state, and federal programs sometimes provide grants, tax credits, or low-interest loans for mitigation measures like elevating homes or installing storm-resistant windows. Check with local emergency management and building departments.
Cost-benefit thinking
Compare upfront costs with life-safety benefits and long-term savings. A resilience upgrade can lower repair costs, decrease downtime, and sometimes reduce insurance premiums.
Codes, standards, and permitting
Build to the latest codes and standards for your hazard zones to maximize safety and avoid costly rework.
Building codes and hazard-specific standards
Follow local building codes and international or national standards (IBC, IRC, ASCE 7, FEMA P-456, ICC-500). These establish minimum requirements for wind, seismic, flood, and other hazards.
Working with professionals
Hire licensed architects, engineers, and contractors who understand local hazards and code requirements. You’ll need their expertise for complex retrofits, structural design, and permitting.
Permitting and inspections
Obtain required permits and schedule inspections during construction. Proper permitting ensures your work meets safety standards and often is required for insurance claims and resale.
Community resilience and neighbor coordination
Your home is part of a broader community. Coordinated action multiplies resilience and speeds recovery.
Shared infrastructure and mutual aid
Coordinate with neighbors on shared risks like drainage, vegetation management, and emergency response. Community plans for fuel sharing, transport, and shelters can be lifesaving.
Local emergency plans and resources
Know your community’s emergency plans and resources. Participate in trainings and drills so you’re aligned with local responders and neighbors.
Checklists and decision aids
Use clear checklists to prioritize actions. This helps you manage projects and track progress.
Priority actions table
| Priority | Action | Estimated cost | Rationale |
|---|---|---|---|
| High | Elevate utilities; install automatic gas shutoff | $500–$5,000 | Prevent major damage and hazards during flood/earthquake |
| High | Secure roof connections and garage doors | $500–$3,000 | Reduces wind damage and collapse risk |
| Medium | Install impact-resistant windows or shutters | $1,000–$10,000 | Protects against wind and debris |
| Medium | Add backup power (portable generator) | $500–$3,500 | Maintains essential functions during outage |
| Low | Replace siding with non-combustible material | $5,000–$15,000 | Improves wildfire resistance and longevity |
Practical project plan for building or upgrading
A phased approach helps you manage costs, permits, and disruptions. You’ll sequence site work, structural improvements, envelope upgrades, and systems installations.
Typical phases
- Risk assessment and design: surveys, hazard maps, design goals.
- Permitting and site prep: grading, access, utilities.
- Foundation and structural framing: continuous load path and anchors.
- Building envelope: roofing, windows, doors, siding.
- Systems: HVAC, electrical, water, backup power.
- Finishes and landscaping: defensible space and hardscaping.
- Inspection and commissioning: testing systems and documentation.
Case studies and examples
Seeing what others have done can inform your choices. You’ll find examples of homes elevated after floods, retrofitted for earthquakes, and designed to survive wildfires.
Example: Coastal home elevated on pilings
A family moved their living space above the base flood elevation, used breakaway walls on the ground level, and installed an auto-stop gas valve. The house survived a major storm with minimal structural damage and reduced repair costs.
Example: Wildfire-hardened home
Homeowners replaced combustible siding with fiber cement, sealed vents, installed tempered glass, and created a defensible perimeter of low-flammability landscaping. The house survived a nearby wildfire with only minor exterior scorch marks.
Final considerations and next steps
Building a disaster-resilient home is both technical and personal. You’ll balance budget, risk tolerance, lifestyle, and local conditions to make the right choices.
Start with a simple assessment
List hazards, prioritize actions by urgency and cost, and get quotes from reputable contractors for critical items. Even small steps like securing roof connections or elevating utilities have outsized benefits.
Keep learning and adapting
As new materials, technologies, and code requirements emerge, update your plans. Resilience is an ongoing practice—regular maintenance, inspections, and updates will keep your home prepared for future challenges.
Resources to consult
Professional engineers, local building departments, FEMA guidance, state hazard mitigation offices, and reputable nonprofits can provide guidance, technical details, and funding opportunities. Reach out and use their expertise to refine your plan.
If you’d like, you can share details about your location, your primary concerns (flood, wind, fire, quake), and whether you’re building new or retrofitting. I can help you make a prioritized, cost-effective plan tailored to your situation.

